Month: October 2025

  • Sizing Blog Images

    Sizing Blog Images

    Introduction

    You must consider both size and quality when creating a a blog image. Images have multiple conflicting interests. You must consider the specific blog post topic and the theme of the web site. Next you need to create an image that has a fast load time, often the image must be compressed, or a specific file format and finally it must be a quality image that makes the page appealing. We need to find the right balance and consider all these options.

    The most important image of any post is the main image displayed at the top of your blog post. This image is often called the “featured image”. I will explore some of observations that will give you some guidelines and suggestions to create these featured images.

    Make note that I will often reference exact image pixel dimentions. They will be displayed in the format of (680×382), meaning 680 pixels x 382 pixels. Generally speaking, you want the length of the featured image to be the wide of the main posting.

    General rules for any image

    Most often the best way to create a fast load time is to use compress images like jpeg and to use image ratio’s that produce a smaller image. But, smaller images tend to not look as sharp on high resolution monitors. Also, you can try using less colors when making an image.

    • Only crop from larger images images.
    • When making a custom images, use less colors.
    • Only resize larger image to smaller, not smaller to a larger.
    • Keep images < 200 kb for fast load time. Max can be 500 kb.

    Word Press size recommendations

    • Thumbnails 150 x 150
    • Medium 300 x 300
    • Large 1024 x 1024

    Image Resolution

    You may see references to this term. Although it is often discussed, I have not personally found it to be a very useful term and do not generally use it when creating iamges. I have included this concern as a reference only, in case you come across it.

    Image resolution is often described in dots-per-inch (dpi). Older displays are typically 72 dpi and modern displays are 200 – 400 dpi.
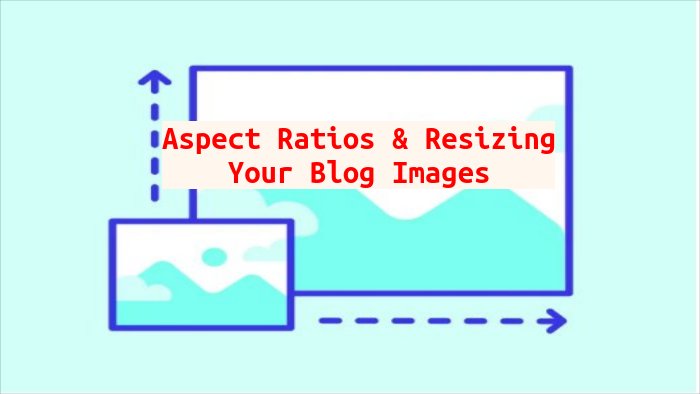
    Aspects ratios

    I feel that the best aspect ratio is 16×9 or 4×3. I choose based on the type or article I am writing. Ratio is based on wide x height of the image. So, for the fist example it is 16 wide x 9 high. the 800×450 is a good choice if most audiances will be accessiing by mobile devices.

    • 16×9: 1200×675 or 800×450 or 680×382
    • 4×3: 800×600
    • 2×1: 800×400, 600×300, 1170×585 (Slider)
    • 3×2: 800×600
    • 1×2: 1200×600
    • 4×1: 728×90 or 1900×250 (Header)

    File Formats

    I generally save my files in jpeg format, they have good compression and can saved in native format by most photo editors.

    • jpeg = General photos
    • gif = Animations and product photos.
    • png = Graphics requiring background transparency like icons and logos.
    • webP = Product banners, and featured images, good replacement for jpg.

    Guidelines

    • Background: 1920×1080, ratio 16:9, size < 20 MB
    • Header: 1280×720, ratio 16:9, size < 10 MB
    • Featured Image: 800×450, ratio 16:9, size <200 kb
    • Featured Image: 1200×900, ratio 4:3, size < 200kb
    • Banner: 600×160 (regular), ratio 15×4, size < 150 kb.
    • Logo: 100×100 (square), ratio 1:1 ratio, size < 100 kb
    • Site icon: 512×512, ratio 1:1

    References

    • https://blog.hubspot.com/website/image-size-for-website
    • https://wpjoli.com/blog/best-featured-image-size-wordpress/
    • https://calculateaspectratio.com/
  • Create & Deploy SSH Keys

    Create & Deploy SSH Keys

    Introduction

    Most folks are familiar with logging into a device or a a web page using a username and password. But a more secure method is to use a public private key exchange.

    Ubuntu comes preinstalled with all the tools necessary to create public private keys. The private key is kept hidden and secure. The public key will be give out freely. It is recommend that you rotate your key pair frequently as a safety precaution.

    In this article, we will look you how to generate a key pair, save your private key to a secure location, copy your public key to a remote host, troubleshoot, and introduce an auto login auto method.

    Create a key pair

    Login to the Linux computer that will be the device that you will connect from. This computer is the main control computer and where you will save your private key.

    Open a command line prompt and run …

    ssh-keygen -t rsa

    After the keys are generated, they will be stored under:

    Store the fingerprints of the remote PC

    To get started using the key exchange method for connecting via SSH, you must have an existing user account on the remote server that you want to connect too.

    But, before we can use the keys, we need to first store the remote server’s finger prints. We do this by sshing to the remote server three times.

    • Server’s host-name (i.e. server1).
    • Server’s FQDN (server1.mycomapny.com).
    • Server’s IP address (192.168.10.100).

    Each time you ssh, you will be cautioned that the server is unknown and do you want to store the fingerprint. Select yes.

    The remote server’s fingerprints will then be stored in a file under the specific user at /home/username/.ssh/known_hosts.

    Push the public key to the remote host

    Next, we need to push our public key to the remote server.

    This will create the ~/.ssh/authorized_keys directory on the remote server. If it does not exist, it will create it and place the public key inside it.

    Connect to remote device using key exchange

    Once you have created your keys, stored the remote server finger print, pushed your public key to it, you are now ready to login using the key exchange method instead of a username and password.

    Using putty, go to connection, auth, credentials and fill in the file path to your private key under “Public Key authentication”. Now when you connect, it will automatically do the key exchange and auto log you in.

    Add a passphrase to your private key

    For additional security, you can add a passphrase to your key. If the key gets compromised, bad actors will need to crack the passphrase first before they can use the key. It is essentially a password for your key.

    This may give you a little extra time, in the event of a compromise, for to generate new keys. It is best practice to add a passphrase when you create a key pair.

    To clear a passphrase, just hit enter, when it prompts you too add a phrase.

    Automatically present your private key

    If you add a passphrase to a key you will be prompted to enter it each time you logon to a remote server. If you have multiple servers to login to, it can become a burden.

    The solution is to temporary store your passphrase. It will only be kept as log as the current session is running. If you logout of you session the temp file is auto removed.

    It will be auto presented on login by running two small built in programs by using these commands.

    Use a key other than the default

    You can specify the file path to a specific key or if it is not stored in the default location by using the -i switch.

    -i = identity file (aka. private key)

    Troubleshoot File Permissions

    1. Verify .ssh and authorized keys belong to the correct user. chown -R user:user ~/.ssh
    2. Check permissions of files.
      • Authorized_keys = 644 = loaded on the remote servers you are connecting to
      • .ssh = 700
      • public key = 644
      • private key = 600
      • known_hosts = 644
      • home directory = /home/user = chmod go-w /home/user
    3. restart ssh after permissions update = $ service ssh restart

    Remove a host from authorized_host file

    If you replace a remote host that you connect to and reuse the IP address or the host name. they next time you connect you may get an error. This is because the remote host fingerprint has changed. The older fingerprint needs to be removed and and new fingerprint needs to be installed (see above).

    Reference

    https://www.digitalocean.com/community/tutorials/ssh-essentials-working-with-ssh-servers-clients-and-keys