Introduction
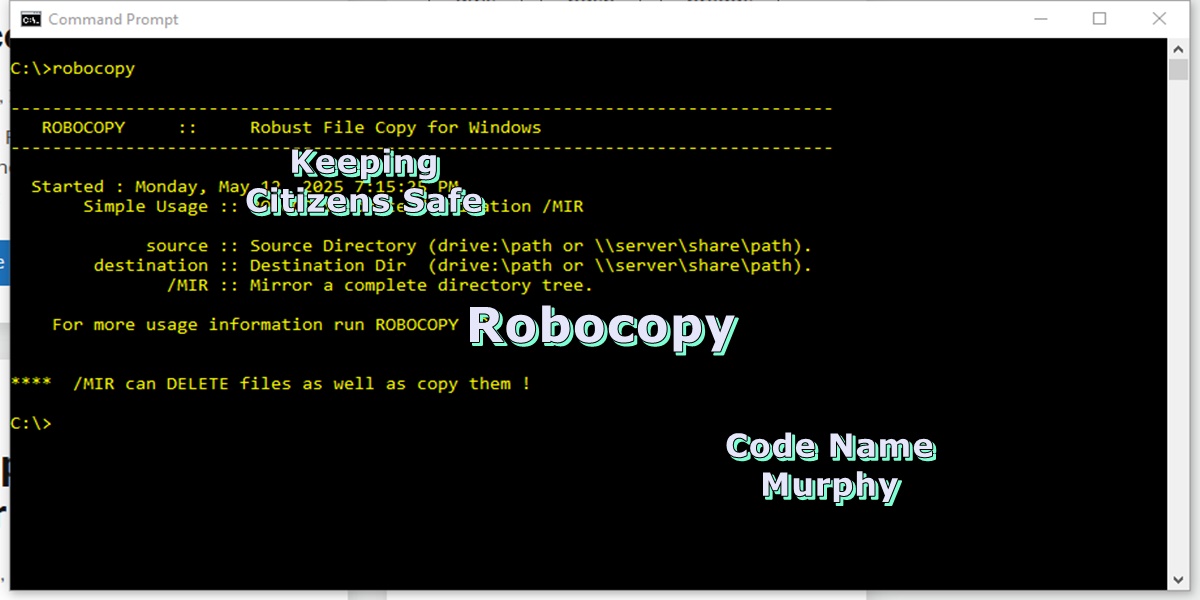
Robocopy (Robust Copy) is a command line tool for copying files in Windows. It replaces the older ‘copy’ command. It contains many new features and can copy files both to an external hard drive or a remote computer.
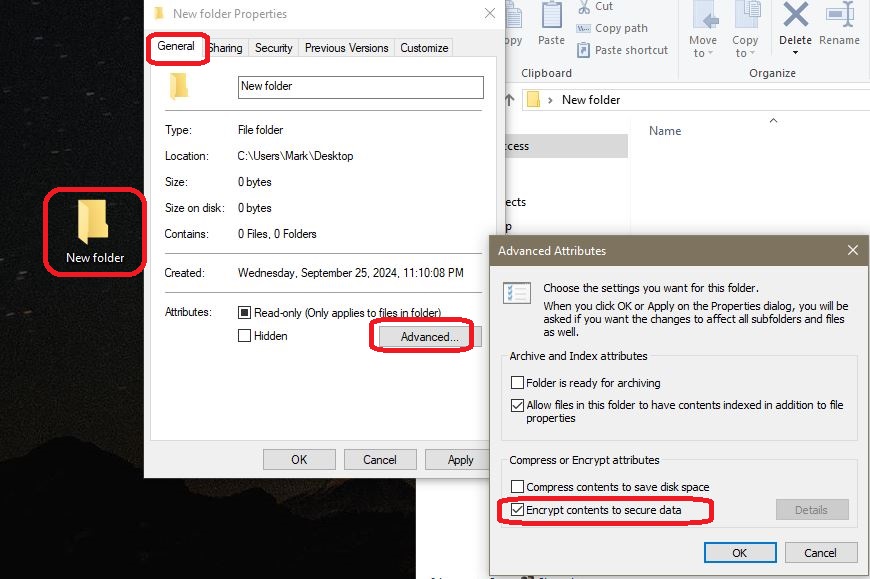
Before you can copy files to an external hard drive, you need to create a folder on the destination drive first and set the permission on that folder to ‘Everyone’ (see below). I like to somewhat mirror the folder structure of the source and destination files. It makes for an easy reference, when you need to look for the files on the backup.
Command Layout
The three primary copy switches are /E, /S, and /MIR. They will copy just the data, attributes, and timestamps (/COPY:DAT), and not file permissions. The default behavior (not using any switches) of robocopy is to copy only newer files and overwrite the older files at the destination.
The basic format of the command.
robocopy <source directory> <destination directory> <file to copy> <switches>If you are copying files you are not the owner of, you will need to run the the command prompt as an Administrator and use the /B switch to override the file and folder permissions. You will typically want to use the /Z if coping files over a network and you want to exclude Hidden and System files. The /TEE switch is only necessary if it is an attended backup. Finally, I like to drop a log file in the backup folder in case I need to review anything.
Copy Switches
- /L Test the command before you execute it.
- /S Do not copy empty directories.
- /E Copy all directories, including empty ones.
- /MIR Sync a directory. (Caution! If a file is deleted in source, will be deleted in destination).
- /B Copy in backup mode. Copy all files regardless of permissions. (Needed if copying files other than your own. Run command prompt as an Administrator).
Network Switches
- /Z Use Restart mode, Start copy where you left off. (Needed when possible network interference).
- /ZB Use Restart mode & Backup mode. (Needed when coping over a network).
- /W:2 Wait time between retries. (Needed when copying over a network).
- /R:1 The number of retries, if the file is locked. (Needed when coping over a network).
Exclude Switches
- /XA:H Exclude files with the attribute Hidden. (Typically want to use this switch)
- /XA:S Exclude files with the attribute System. (Typically always want to use the switch).
- /XA:SH Exclude System and Hidden files (Needed when coping a User’s Profile).
- /XJ exclude junction points. (Needed when coping a User’s Profile).
- /FTT format in FAT32 File system. (Needed if backing up files to a Linux host).
- /XD exclude directory. Use if you want to exclude some Hidden files and not others.
Logging Switches
- /NFL Don’t log file names of copied files.
- /NDL Don’t log directory names. (Include if using a log file).
- /NP Suppress % copied output to a log file. (Include if using a log file).
- /LOG:/F:\backup.log Writes output to a log file.
- /LOG+:F:\file.log Append output to an existing log file.
- /TEE Write output to the console window AND the log file.
Get Help
robocopy /?Copy Files to an External Drive
Copy one or two files. If you have spaces in the file path, be sure to enclose in quotes.
robocopy "C:\users\username\desktop\folder 1" D:\backup file1.txt
robocopy "C:\users\username\desktop\folder 2" D:\backup file1.txt file2.pdf
Copy files that end with pdf or begin with Sam. The * is a wildcard.
robocopy "C:\users\username\desktop\folder 1" "D:\backup\folder 2" *.pdf
robocopy "C:\users\username\desktop\folder 1" "D:\backup\folder 2" Sam.*
Copy all files & folders on the desktop, & make a log file. Also, show the results on the screen as the command is running.
robocopy C:\Users\John\Desktop D:\backup\Desktop /MIR > C:\backup.log /TEECopy a user’s profile (MIR), exclude the junction points (XJ), system files (XA:S), and the user’s “AppData” folder (XD). Suppress the percent copied results (NP). Junction points are a kind of soft link or a shortcut. The copy process could get stuck in a copy loop if you do not exclude. This will still copy any other hidden files. Output results to screen and log file (TEE & LOG).
robocopy "C:\Users\John" "D:\backup\Users\John" /MIR /XA:S /XD "c:\Users\John\AppData" /XJ /TEE /NP /LOG:F:\backup\backup.logCopy Files to a remote PC
Copy a directory, subdirectories, and files to a remote computer.
robocopy C:\Data \\PCName\c$\Data /MIR /Z /R:2 /W:1 Copy a directory, subdirectories, and files, but excluding system & hidden files, to a remote Linux PC.
robocopy C:\Data \\NAS\data /MIR /W:0 /R:1 /XA:SH /FFT Step-By-Step Guide to Backup Your Files
Begin by plugging in a USB stick into any open port on the PC. In our example, it shows up as “Drive F”. Now, make a new folder called F:\backups.
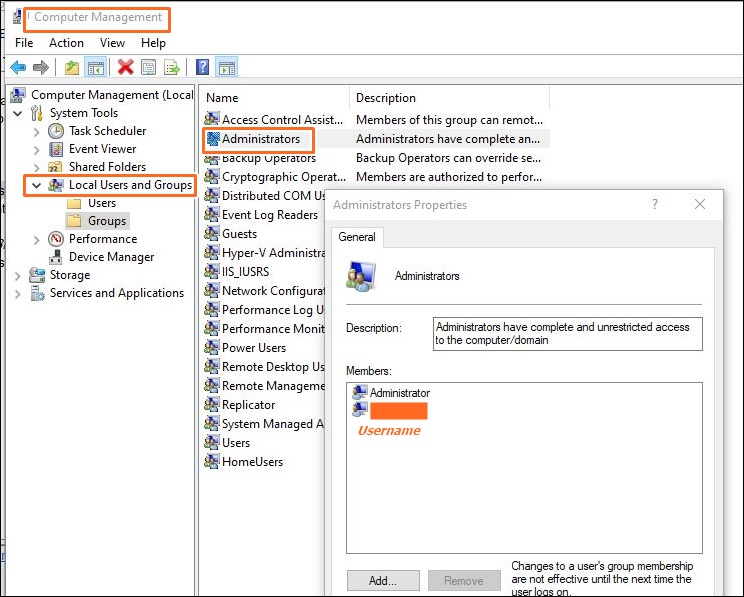
Set the permissions on the new folder to ‘Everyone’ by right clicking on the folder, go to properties, security tab, select add group or username, and select check names. Be sure to verify that the “Everyone” has all the allow permissions.

Now, any folders or files copied to the “backup” folder during the backup, should inherit the same permissions. (i.e. Everyone).
If you don’t do this and you need to access the files on a PC other than the original computer, you may not be able to open the files. This is because you are not logged in as the original user that ran the backup. But, with folder permissions set to Everyone, you can plug the external drive or USB stick into any computer, and you will have full access to the copied files.
Make a Backup Script
We will backup the contents of a generic folder and two user’s profiles. It will copy to an external hard drive and also to a remote windows computer. For this example, we are logged in as a user called Jack and it is an “admin” account, so we can be granted rights to copy files of other users.
First, we will start by coping all files in a folder called “Data”. Since we don’t know who owns this folder, we will use the /B switch to overwrite any potential permissions issues. Finally, we will make a log file but exclude the percent copied for each file. As this unnecessary clogs up the log output.
rem backup.bat
robocopy C:\Data F:\backups\data /MIR /B /NP /LOG:F:\backup.log
Next, we can now copy Jack and Jill’s profiles. Jack’s profile, we will exclude all hidden files, system files, and junction points. Since his “AppData” folder is already hidden, we do not need to specifically exclude it.
In Jill’s profile, we have several hidden files that we want to copy that contain her SSH keys. So, we will not create a blanket exclusion for all hidden files. Instead, we will exclude her “AppData” folder specifically. Finally, we will add to the previously created log file, but again we will exclude the total percent copied. Also, we need to add her file using the /B switch to copy in backup mode.
robocopy C:\Users\Jack F:\backups\Jack /MIR /XA:SH /XJ /NP /LOG+:F:\backup.log
robocopy C:\Users\Jill F:\backups\Jill /MIR /XA:S /XD C:\Users\John\AppData /B /XJ /NP /LOG+:F:\backup.log
Finally, copy the same files to a remote computer for a secondary backup. As before, we will use the /MIR switch to make an exact duplicate folder tree, /B to run in backup mode and exclude the System, Hidden, Junction Points, and specifically exclude Jill’s “AppData” folder. Also, we use the /Z (restart mode), /R (retry) and /W (wait) in case there are network issues.
robocopy C:\data \\PCName\c$\backups\data /MIR /ZB /XA:SH /XJ /R:1 /W:1
robocopy C:\Users\Jack \\PCName\c$\backups\Jack /MIR /ZB /XA:SH /XJ /R:1 /W:1
robocopy C:\Users\Jill \\PCName\c$\backups\Jill /MIR /ZB /XA:S /XD C:\Users\Jill\AppData /XJ /R:1 /W:2
Save and Execute the Script
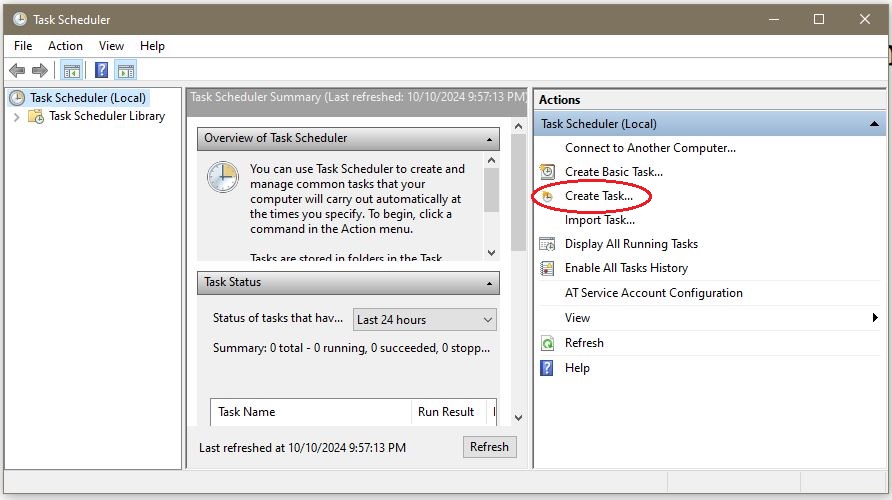
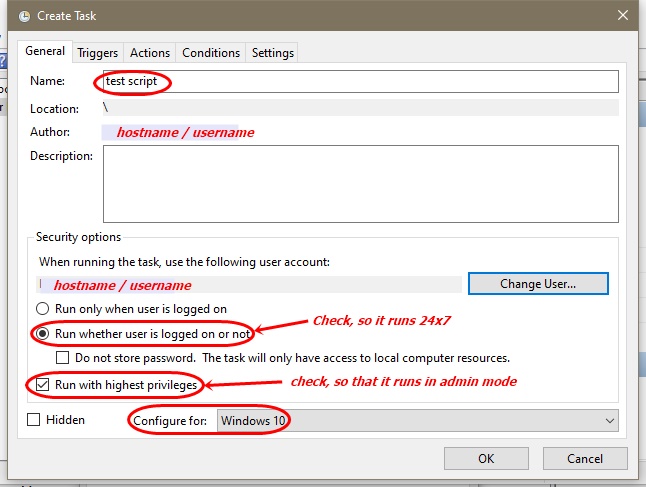
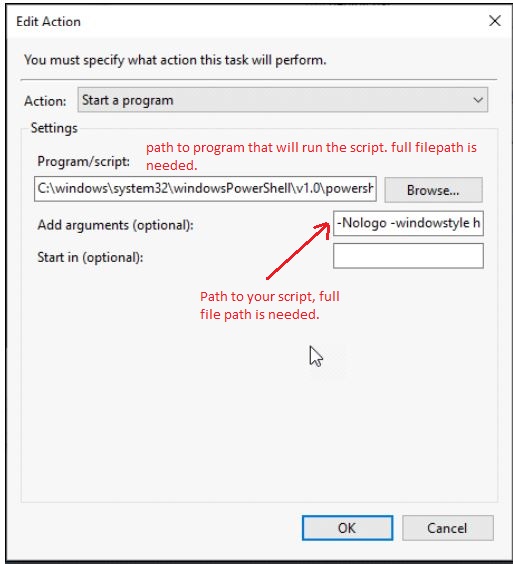
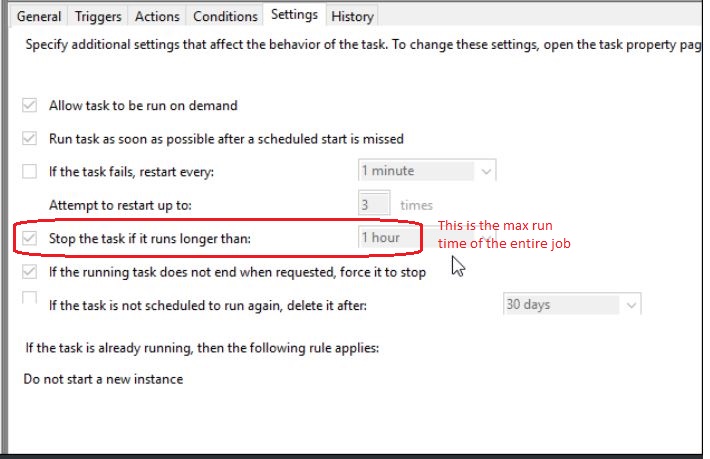
Save the script to Jack’s desktop as backup.bat. To run the script, open a command prompt as an Admin, and navigate to Jack’s desktop. Type the script name and hit enter. To run the script nightly, you can set up a scheduled task to execute.
References
https://ss64.com/nt/robocopy.html
http://caughtinpixels.com/how-to-create-a-backup-script-using-robocopy/